
One of the fun aspects about growing succulents is how easily they reproduce – and propagating plants from pups may be the easiest way of all to grow new specimens.
But you’re more likely to succeed in propagating succulents from offsets if you follow a few important steps.

We link to vendors to help you find relevant products. If you buy from one of our links, we may earn a commission.
Perhaps you’ve tried this technique before and failed? No judgment! It may be that you simply skipped one or two of the steps.
Before we get started, if you need to review the best practices for growing and caring for succulents, be sure to read our guide.
Whatever your experience, so that your very first (or next) attempts at growing new succulents from pups are successful, in this article we’re going to cover everything you’ll need to know.
Ready to learn the secrets of propagating succulents from offsets?
What Are Offsets?
First, let’s make sure we’re all on the same page first regarding the lingo.
Plants reproduce in more than one way. They can produce seeds of course, which is known as sexual reproduction. This involves the genes of two different individuals combining in a seed that eventually germinates and forms a new plant.
Many plants have another strategy in addition to producing seeds – asexual reproduction, which is essentially producing clones of themselves.
In the case of succulents, this can happen when a leaf falls and takes root on the ground, but it is also achieved in many species through the production of offsets. This results in a clumping growth habit.

These “babies” are clones of the mother, and are also known as pups or plantlets. They usually grow from the base of the succulent, but in some cases they are formed on the upper part, along the stem, or even, as you’ll learn later in the article, on the edge of the leaves.
The botanical world is actually full of species that reproduce this way, including bromeliads, tulips, onions, and spider plants – as well as a whole bevy of succulents.
For us gardeners, taking advantage of this botanical reproduction strategy gives us a way to grow more succulents quite effortlessly!
While you can also propagate succulents from leaves or seeds, using offsets to create more specimens tends to be faster and easier.
What Types of Succulents Grow Offsets?
You may be wondering if the particular type of succulent you’re growing can be propagated via offsets.
Providing a definitive list of all species with this reproductive ability is beyond the scope of this article, let’s take a tour of some of the most popular candidates.

Do you have an aloe vera among your houseplant collection, serving as part of your first aid kit perhaps?
You may have noticed baby aloes popping up beside the mother plants. Like most succulents, aloe offsets are formed at the base of mama plants.
And yes, those are pups that can be transferred to pots of their own.
With a growth habit so similar to aloe that they are sometimes difficult to tell apart, agaves can also be propagated in this way, which is a great way to save on your xeriscaping budget.

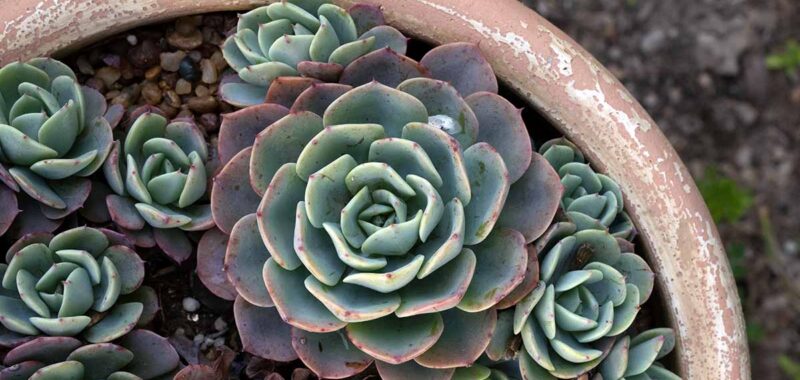
There are many different types of succulents in cultivation that have a low growing, rosette shape, and most of these also grow offsets.
These include aeoniums, echeverias, graptopedalums, pachyverias, and sempervivums, also known as hens and chicks, to name a few!
Some types grow pups on noticeable stems, such as Chinese dunce cap, and greenovias.

There are so many great pup-producing succulents that can be propagated in this way!
Some of my personal favorites include concrete leaf plants, haworthias, haworthiopsis, gasterias, and tiger jaws.

Not all species grow their pups from the base of the mother, though.
Mother of millions (Kalanchoe delagoensis), also known as mother of thousands, is a type of kalanchoe that produces its pups on the edges of its leaves.

One of the most common houseplants because of its tolerance of neglect, the snake plant is also a type of succulent that grows pups at its base that can be used for propagation.
And while, as mentioned, this is by no means an exhaustive list, let’s finish off our tour of some of the succulents that can be propagated via offsets with a mention of the euphorbias.

Some euphorbias can also be propagated in this manner, such as the spiny African milk barrel.
When to Propagate Offsets
Before you start assessing other factors of readiness, wait until the temperature is fairly mild, such as in spring or fall, so that the specimen isn’t about to go into either a summer or winter dormancy.
Dormant succulents won’t be able to recover as well from the separation process.
If you aren’t sure when the dormancy period of the species you are growing is, plan to carry out the propagation in spring, as active growth is more likely at that time.
The next question you should ask is – are the babies big enough to leave their mother?
It can be tricky to know exactly when a pup is ready to be separated, and this won’t be the same for each species.
To start with, make sure the offset has at least a few leaves.

For many succulents, such as haworthias, haworthiopsis, and gasteria, wait until the pup is about half the size of the mother before removing.
Another factor you should consider before separating offsets is flowering: don’t take offsets when either the mother or the pup is in bloom.
It takes a lot of energy for a succulent to bloom, and if you interrupt the flowering process with what is essentially a surgical procedure, the specimen may not have enough energy to recover.

These Haworthiopsis pups are the right size for separating, but the plant is flowering.
If the season is right, the pups are the right size, and neither mother nor babies are flowering, your succulent is a good candidate for propagation.
Are you considering propagating offsets because your plant is getting crowded in its pot? That would certainly be a valid motivation for propagating offsets.

These hens and chicks pups are almost as big as their mother, and this tiny pot is getting crowded.
Of course instead of separating the offsets, you could just repot the whole clump instead of dividing it.
Supplies Needed
When you’ve decided the pups are ready to be separated, make sure you have your propagation supplies on hand. You’ll need:
Pots
Aside from size considerations, the type of pot that is best for your new plants depends on the type of climate in your region.
If you’re in a humid location, unglazed terra cotta is a good choice as it will allow the growing medium to dry faster, helping to prevent the succulent from succumbing to rot.
On the other hand, those in arid locations may prefer ceramic, glazed clay, or plastic pots to slow moisture loss.

Wondering if you can reuse some of the old nursery pots you have lying around under your potting bench for this project?
Yes indeed! Just make sure to clean them with soap and water first, and then sanitize them – you can do that by wiping them down with hydrogen peroxide.
Be aware that you should have pretty close to a 100 percent success rate with these clones, so you may want to skip the small nursery pots and reach straight for more permanent, decorative containers.
Two- to three-inch nursery pots will work for many smaller species, but of course you’ll need to adjust for the size of your particular plant. Large species such as agave will need bigger containers.
Are you propagating haworthia, gasteria, hens and chicks, or echeveria babies?
These simple white ceramic pots, available via Amazon, are just the right size.

Set of 6 White Ceramic Succulent Planters
When choosing a pot, keep in mind that there should be no more than one to two inches of room around the offset’s roots.
Learn more about choosing succulent planters in our guide.
Growing Medium
You’ll also need growing medium, and you have options here as well.
If you’re feeling motivated, you can start from scratch and make your own succulent potting soil to use for propagation – just make sure it has a grit content of 50 to 70 percent.
Personally I like to start with 50 percent commercial cacti and succulent mix and add 50 percent additional grit to ensure that there’s adequate drainage.
There are many commercial mixes that will do the job here, but one of my favorite peat-free brands is Rosy Soil Cacti and Succulents Mix.

Rosy Soil Cacti and Succulents Mix
You can pick up a four-quart bag of Rosy Soil Cacti and Succulents Mix from Rosy Soil via Walmart.
Choose a fine-grained grit if the species you’re working with has fine roots, such as haworthia.
You can choose from a number of different materials such as coarse sand, pumice, or lava rocks.
If you’re leaning towards the latter, you’ll find one-quart bags of quarter-inch lava rocks available from Bonsai Boy.

1/4-Inch Red Lava Rock in 1-Qt Bag
Lava rocks can also be used to add a functional and attractive top dressing – you’ll learn more about that later in this article, so keep reading!
Fungicide
As a gardener dedicated to environmentally friendly practices in the garden, I prefer to take a nontoxic approach with my ornamentals and houseplants as well.
That’s why when a fungicide is called for, I reach for biofungicides.
These are types of inoculants that harness the power of beneficial fungi such as Trichoderma species to keep pathogens at bay – kind of like using probiotics for your plants!
Mikro-Root is one such product that contains Trichoderma species, and in addition to serving as a biofungicide, it also helps stimulate root growth and is considered a bio-fertilizer, similar to legume inoculants.

Mikro-Root Bio-Fungicide
Mikro-Root is available for purchase in an assortment of pack sizes from Microbial Applications via Arbico Organics.
Scissors or Snips
Depending on the species you are propagating, you will likely need a pair of scissors or garden snips for this project as well.
Want a pair of snips to dedicate to your plant propagation projects?
Consider this lightweight pair of six-inch pruning snips that features a needle nose tip and is made from high-carbon steel.

6-Inch High Carbon Steel Pruning Snips
These six-inch pruning snips are available at Terrain.
In addition to these supplies, if you’re going to be working with a prickly specimen like an agave or certain types of euphorbias, make sure to get some thick gardening gloves to protect yourself.
Don’t have a pair of gardening gloves you love yet?
Be sure to read our guide to 17 of the best gardening gloves.
How to Propagate Succulents from Offsets
Some offsets will pull right off the mother plant with little resistance, such as those of hens and chicks.
Others may need to be cut away t with a sharp blade, such as haworthias. For these types, consider removing the entire plant from the pot before separating the pups.
Tease the offset apart from the mother plant, or use the snips – sterilized first, of course – if needed, to sever the pup’s connection to its parent.

When you’ve separated the offset, now you’ll need to wait.
It’s best to allow both the parent and the pup to rest for a few days before repotting until their wounds have formed a callus.

Before allowing the wounds to dry, apply fungicide or biofungicide if you are using it, following the manufacturer’s directions on the product of your choice.
Situate the plants with their wounds facing up on a plate or in a shallow box out of direct sunlight, in a dry location while you wait for them to callus.
Depending on the plant and your climatic conditions, it will take from a few days up to a month for the wounds to callus – but a week is average.
Once the wounds have formed calluses, it’s time to transplant the offsets and parents into their new containers.
Put a layer of growing medium into the bottom of the pot, then situate the offset on top of the growing medium.
Adjust the amount of medium if needed – don’t bury the foliage in the growing medium, but do make sure that the roots are well-covered and won’t pop out of the soil.
Repeat with the mother plant if it needs to be repotted as well.
When potting your offsets, you may want to add a layer of inorganic material as a top dressing.
A top dressing helps keep the foliage off wet soil, reduces the risk of fungus gnats, and can offer an attractive background for your succulent’s leaves.
Either coarse sand, small lava rocks, fine river rocks, or pumice can be used as a top dressing to cover the growing medium for small specimens. For larger plants like agave, use larger lava rocks or river rocks.

Wait a week before watering the repotted plants, and fertilize only when you see new growth on the aboveground portion of the plant.
Plenty of Precious Plant Pups
Now you know the secrets to successfully propagating succulents from offsets: make sure to let those wounds callus off first, take precautions against fungi, and don’t water immediately after potting.
Which fleshy plants will you propagate? Let us know in the comments section below. And if you’re wondering if a succulent plant not covered in this article can be propagated via offsets, let us know and we’ll be happy to help you out!
Feel like soaking up more fleshy floral knowledge? We have more succulent articles for you to read right here: